
August 18, 2026 • Developer Guide • By Sayad Md Bayezid Hosan
The Complete Tracking Setup Guide: Meta Pixel, Conversions API, GA4 & Microsoft Clarity
Most tracking guides cover one tool in isolation. In practice, a real tracking stack is never just one thing — it's the Meta Pixel firing in the browser, the Conversions API confirming the same event from your server, GA4 recording the full session, and Microsoft Clarity showing you what actually happened on screen when a number looks wrong. This guide sets up all four together, in the order that avoids the two most common failure modes: double-counted conversions and silently broken tracking nobody notices for weeks.
Every step below reflects the current 2026 interface — including Meta's new one-click Conversions API activation, which changed significantly in April 2026. Where a manual, fully server-side implementation is the better choice, that path is covered too, with real request payloads you can copy directly.
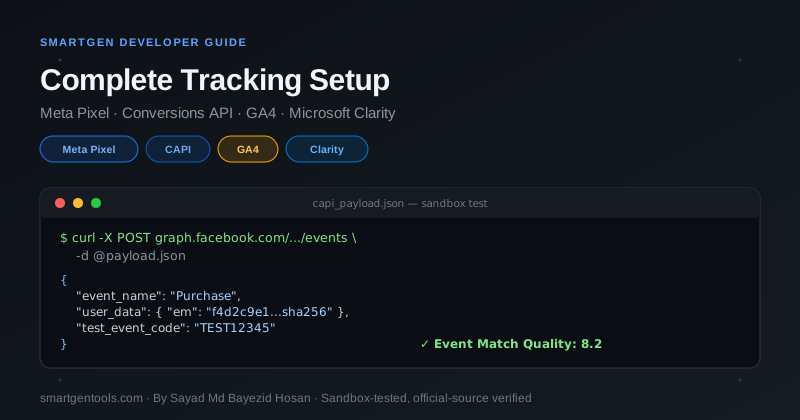
Overview
| Tool | What It Tracks | Runs On |
|---|---|---|
| Meta Pixel | Browser-side conversion events for Meta ad optimization | Client (JavaScript) |
| Conversions API (CAPI) | Server-side confirmation of the same events, resilient to ad blockers and browser restrictions | Server (HTTP API) |
| GA4 | Full website analytics — sessions, events, funnels, audiences | Client (JavaScript) + optional server-side |
| Microsoft Clarity | Session recordings and heatmaps — why a number moved, not just that it moved | Client (JavaScript) |
Meta Pixel and CAPI should always report the same underlying events — that duplication is intentional and is what deduplication (covered in Part 2) is for. GA4 and Clarity are independent of Meta but read the exact same on-page events, which is why installing them together, and connecting Clarity to GA4 at the end, is worth doing in one sitting rather than piecemeal.
What You'll Need (Prerequisites)
- A live website (not local or staging — Meta and Google both require a real, publicly reachable domain).
- Admin access to your site's
<head>section, or access to Google Tag Manager if you're using it instead of manual code. - A Meta Business Manager account (required for both the Pixel and Conversions API).
- A Google account with access to create a GA4 property.
- A Microsoft, Google, or Facebook account to sign into Microsoft Clarity.
- If you're implementing CAPI manually: basic comfort with JSON and either a server environment, a serverless function, or a server-side Google Tag Manager container.
Architecture: How These Four Tools Work Together
The diagram below shows the two parallel paths — browser and server — and where deduplication happens.

Part 1: Meta Pixel Setup
1.1 Create Your Pixel (Now Called a "Dataset")
Meta has been folding the term "Pixel" into a broader concept called a dataset inside Events Manager — you'll see both terms used interchangeably in 2026, and the ID works identically either way.
- Go to Meta Events Manager.
- Click Connect Data, then select Web.
- Click Connect, enter a name for your pixel, then click Create pixel.
- This generates your Pixel ID — a 15–16 digit number, visible at the top of the pixel's Overview tab. Copy it; you'll need it in every step that follows.
1.2 Install the Base Code
Meta offers three installation paths — a partner integration (Shopify, WooCommerce, etc.), the point-and-click Event Setup Tool, or manual code. The end result is identical; choose based on your platform.
For manual installation, copy the base code and paste it inside your site's <head> tag, on every page, not just the homepage:
<!-- Meta Pixel Base Code -->
<script>
!function(f,b,e,v,n,t,s)
{if(f.fbq)return;n=f.fbq=function(){n.callMethod?
n.callMethod.apply(n,arguments):n.queue.push(arguments)};
if(!f._fbq)f._fbq=n;n.push=n;n.loaded=!0;n.version='2.0';
n.queue=[];t=b.createElement(e);t.async=!0;
t.src=v;s=b.getElementsByTagName(e)[0];
s.parentNode.insertBefore(t,s)}(window, document,'script',
'https://connect.facebook.net/en_US/fbevents.js');
fbq('init', 'YOUR_PIXEL_ID');
fbq('track', 'PageView');
</script>
<noscript><img height="1" width="1" style="display:none"
src="https://www.facebook.com/tr?id=YOUR_PIXEL_ID&ev=PageView&noscript=1"
/></noscript>
<!-- End Meta Pixel Base Code -->
Replace YOUR_PIXEL_ID with the ID from Step 1.1 in both places it appears. PageView fires automatically — you never call it manually beyond this base snippet.
If you use Google Tag Manager instead, add this as a Custom HTML tag set to fire on All Pages, rather than pasting it directly into your template — this keeps every tracking script in one place, which matters once you're also installing GA4 and Clarity.
⚠️ Install the Pixel exactly once per method. Combining a partner integration with a manually pasted base code is the single most common cause of doubled
PageViewandPurchasecounts. Pick one installation path.
1.3 Track Standard Events
Beyond PageView, Meta defines 17 standard events — Purchase, Lead, AddToCart, CompleteRegistration, and others — each with a consistent name and parameter structure that unlocks Meta's full optimization and reporting features. Use a standard event whenever your action fits one; only use a custom event (fbq('trackCustom', 'YourEventName')) when nothing standard applies, since custom events can't be optimized for directly until wrapped in a Custom Conversion rule inside Events Manager.
Example — tracking a purchase with value and currency, which Meta needs to optimize for revenue:
<script>
fbq('track', 'Purchase', {
  value: 49.99,
  currency: 'USD',
  content_ids: ['SKU_123'],
  content_type: 'product'
});
</script>
1.4 Sandbox Verification: Test Events & Pixel Helper
Before trusting any of this, verify it in Meta's built-in sandbox:
- In Events Manager, open your pixel and go to the Test Events tab.
- Browse your own site in another tab — Test Events shows activity in near real time.
- Confirm
PageViewfires once per page load, and that any custom or standard events you've added appear with the correct parameters. - Install the Meta Pixel Helper browser extension (search for it by name in the Chrome Web Store) for a quick per-page check — it flags firing pixels, duplicate fires, and basic errors directly in the toolbar without needing Events Manager open.
Part 2: Meta Conversions API (Server-Side)
2.1 Two Paths: Which One Do You Need?
As of Meta's April 2026 update, there are genuinely two reasonable ways to set up CAPI:
- Path A — One-click Conversions API: Meta now offers an "Activate Conversions API" button directly on the pixel's Overview tab for eligible accounts. It handles server-side event forwarding automatically, with no developer work. This is the right call for most small and medium businesses.
- Path B — Manual server-side setup: full control over exactly what gets sent, required for custom-built sites, non-standard event data, or accounts not yet eligible for the one-click option. This is the path covered in detail below, since it's also what makes Path A's automation understandable if you ever need to debug it.
2.2 Path A: One-Click Setup
- In Events Manager, open your pixel's Overview tab.
- Look for Activate Conversions API (only shown for eligible accounts).
- Click it, confirm, and Meta begins forwarding matching server-side events automatically.
- Check Events Manager's event quality metrics before and after activation to confirm signal quality actually improved for your account — this isn't guaranteed uniformly across every business type.
2.3 Path B: Manual Setup — Generate an Access Token
- In Events Manager, select your pixel and open the Settings tab.
- Scroll to the Conversions API section and choose Set up manually.
- Click Generate Access Token, and copy it somewhere secure immediately — it's shown only once in full.
- Use a System User token rather than a personal account token wherever possible (create this under Business Settings → Users → System Users). A token tied to a personal account breaks the moment that person loses access — a System User token doesn't.
2.4 Build Your Event Payload
Every CAPI request is a JSON POST to Meta's Graph API, using your Pixel ID and access token. Personally identifiable information — email, phone, first name, last name — must be hashed with SHA-256 before it's sent. Fields like fbp and fbc (Meta's own browser and click identifiers) are sent unhashed.
{
  "data": [
    {
      "event_name": "Purchase",
      "event_time": 1755500000,
      "event_id": "order_48213",
      "action_source": "website",
      "event_source_url": "https://example.com/checkout/success",
      "user_data": {
        "em": ["f4d2c9e1b8a7...  (SHA-256 hash of lowercase email)"],
        "ph": ["a1b2c3d4e5f6...  (SHA-256 hash of phone, digits only)"],
        "fbp": "fb.1.1234567890.1122334455",
        "fbc": "fb.1.1234567890.AbCdEfGhIjKlMnOp"
      },
      "custom_data": {
        "value": 49.99,
        "currency": "USD",
        "content_ids": ["SKU_123"],
        "content_type": "product"
      }
    }
  ],
  "test_event_code": "TEST12345"
}
Send it with a POST request to Meta's Graph API events endpoint for your pixel (check the Meta for Developers Conversions API docs for the current Graph API version number, since Meta increments this periodically):
curl -X POST \
  "https://graph.facebook.com/v[CURRENT_VERSION]/YOUR_PIXEL_ID/events?access_token=YOUR_ACCESS_TOKEN" \
  -H "Content-Type: application/json" \
  -d @payload.json
🔧 Hashing your PII correctly matters more than almost anything else in this section. Use the SmartGen Hash Generator to generate SHA-256 hashes while you're testing — paste in a lowercase, trimmed email address and confirm the hash matches what your server code produces before you assume a mismatch is Meta's fault and not your own normalization bug (capitalization and whitespace in the source string change the hash completely).
🔧 Before sending a payload, validate the JSON structure itself. A single misplaced comma or bracket in a hand-written payload is one of the most common CAPI failure causes. Paste your payload into the SmartGen JSON Formatter & Validator first — it will catch structural errors instantly, before Meta's API ever sees a malformed request.
2.5 Event Deduplication: Matching event_id
Meta's deduplication window is 48 hours. If the browser Pixel and the server CAPI both send an event for the same real-world action, Meta merges them into a single count — but only if both share the exact same event_id. Generate that ID once, client-side, and pass it to both calls for the same action:
<script>
const eventId = 'order_' + orderNumber; // generate once, use in both calls
fbq('track', 'Purchase', { value: 49.99, currency: 'USD' }, { eventID: eventId });
// then send the same eventId as "event_id" in your server-side CAPI payload
</script>
Skipping this step — or generating a different ID on each side — is the most common cause of conversion counts that look roughly double what your actual order data shows.
2.6 Sandbox Testing: test_event_code & Event Match Quality
- In Events Manager, go to your pixel's Test Events tab and copy the code shown there (formatted like
TEST12345). - Include it as the top-level
test_event_codefield in your payload, exactly as shown in the example above. - Trigger a real test action on your site (a test purchase, a form submit).
- Watch the Test Events panel: a correctly deduplicated action shows as one event with two rows — a Browser row and a Server row, sharing the same
event_id. - Check the Event Match Quality (EMQ) score, shown on a 0–10 scale. Meta considers 6.0 or higher a good baseline — if you're below that, add more hashed
user_datafields (email, phone, and any address details you legitimately collect) rather than assuming the integration itself is broken. - Remove
test_event_codefrom your payload before going live — its presence routes events to the sandbox view instead of production reporting.
Part 3: GA4 Setup
If you haven't worked with GA4 before, our Google Web Analytics mega guide covers the reporting side in depth — this section focuses specifically on getting data flowing correctly.
3.1 Create Your Property & Data Stream
- In Google Analytics, go to Admin → Create Property.
- Once the property exists, add a Data Stream — select Web, enter your site URL and a stream name.
- Click Create stream. This generates your Measurement ID, formatted
G-XXXXXXXXXX.
Keep the terminology straight: a Property is the whole GA4 account container; a Data Stream is one specific site or app feeding into it; the Measurement ID identifies that specific stream. All three are easy to confuse when you're troubleshooting later.
3.2 Install: Three Methods
- Google Tag Manager (recommended for most setups) — add a GA4 Configuration tag with your Measurement ID, triggered on All Pages.
- gtag.js (direct code) — paste Google's tag snippet directly into your
<head>, simpler initially but harder to maintain as you add more tracking. - A CMS plugin/integration — for WordPress, Shopify, and similar platforms with native GA4 support.
<!-- Google tag (gtag.js) -->
<script async src="https://www.googletagmanager.com/gtag/js?id=G-XXXXXXXXXX"></script>
<script>
  window.dataLayer = window.dataLayer || [];
  function gtag(){dataLayer.push(arguments);}
  gtag('js', new Date());
  gtag('config', 'G-XXXXXXXXXX');
</script>
3.3 Enable Enhanced Measurement
Under Admin → Data Streams → [your stream], confirm Enhanced Measurement is on. This automatically tracks scrolls, outbound clicks, site search, and file downloads without any additional code — worth checking explicitly, since it's occasionally toggled off by a previous setup step you don't control.
3.4 Sandbox Testing: DebugView
DebugView is GA4's real-time event inspector — the equivalent of Meta's Test Events tab, showing full parameter data per event, with roughly a 60-minute retention window scoped to your specific device.
- Enable debug mode using one of: the Google Analytics Debugger Chrome extension, Google Tag Manager's Preview mode, or (for server-side hits) adding a
debug_mode: trueparameter to the event itself. - In GA4, go to Admin → DebugView.
- Browse your site and watch events populate —
page_view,scroll,click, and any custom events, each with their full parameter set attached. - If an event fires in DebugView but never appears in standard reports, that's expected — non-debug reports can take 24–48 hours to populate. DebugView is a QA tool, not a live monitoring dashboard.
3.5 Server-Side: GA4 Measurement Protocol
For dual client-and-server tracking (mirroring the CAPI pattern from Part 2), GA4's Measurement Protocol sends events directly from your server:
curl -X POST \
  "https://www.google-analytics.com/mp/collect?measurement_id=G-XXXXXXXXXX&api_secret=YOUR_API_SECRET" \
  -H "Content-Type: application/json" \
  -d '{
    "client_id": "1234567890.0987654321",
    "events": [{
      "name": "purchase",
      "params": {
        "currency": "USD",
        "value": 49.99,
        "transaction_id": "order_48213"
      }
    }]
  }'
The api_secret is generated under Admin → Data Streams → [your stream] → Measurement Protocol API secrets. Server-side hits sent this way don't automatically appear in DebugView unless you add the debug_mode parameter to the request — a detail that trips up almost everyone the first time they try it.
Part 4: Microsoft Clarity Setup
4.1 Create Your Project
- Go to clarity.microsoft.com and sign in with a Microsoft, Google, or Facebook account.
- Select New Project, enter a name and your website URL.
- Each project maps to exactly one site or app — track a website and an app separately with two projects.
4.2 Install the Tracking Code
Under Settings → Setup → Install manually → Get tracking code, copy your unique snippet and paste it into your <head>:
<script type="text/javascript">
  (function(c,l,a,r,i,t,y){
    c[a]=c[a]||function(){(c[a].q=c[a].q||[]).push(arguments)};
    t=l.createElement(r);t.async=1;t.src="https://www.clarity.ms/tag/"+i;
    y=l.getElementsByTagName(r)[0];y.parentNode.insertBefore(t,y);
  })(window, document, "clarity", "script", "YOUR_PROJECT_ID");
</script>
Alternatives: install via a platform plugin (WordPress, Shopify, and Wix all have native Clarity support), through Google Tag Manager as a Custom HTML tag, or through the official NPM package (Clarity.init(projectId)) for JavaScript-based projects. Clarity verifies installation automatically within a few minutes; recordings typically begin appearing within a few hours.
4.3 Connect Clarity to GA4 — Closing the Loop
This is the step that turns four separate tools into one coherent stack:
- In Clarity, go to Settings → Setup → Google Analytics.
- Click Connect, sign in with the Google account that owns your GA4 property, and select it.
- Once linked, GA4 segments become filterable directly inside Clarity — meaning you can watch session recordings for a specific GA4 audience (say, everyone who abandoned checkout) without exporting or cross-referencing anything manually.
Bringing It All Together: The Complete Stack
With all four connected, a single user action now produces a coordinated signal: the Pixel and CAPI confirm the conversion to Meta from two directions with a shared event_id, GA4 records the full session and funnel context, and Clarity lets you actually watch what that session looked like if a number ever looks wrong. For campaigns built around tracked links, running them through the SmartGen UTM Builder — covered in more depth in our UTM Campaign Link Builder guide — ensures the source and campaign data arriving in GA4 lines up cleanly with what you're optimizing for in Meta Ads Manager.
If your Pixel work here feeds into retargeting, our Display Advertising & Remarketing guide picks up exactly where this one leaves off.
Common Errors & Troubleshooting
| Symptom | Likely Cause | Fix |
|---|---|---|
| Nothing appears in Meta Test Events | Wrong Pixel ID, invalid/expired access token, or missing test_event_code |
Re-check the ID and token; confirm test_event_code is a top-level payload field |
| Conversion counts look roughly doubled | event_id missing or mismatched between Pixel and CAPI calls |
Generate one event_id client-side and reuse it in both calls for the same action |
| EMQ score below 6.0 | Too few hashed user_data fields |
Add more identifiers (phone, and any address data you legitimately collect) alongside email |
user_data shows readable text, not a hash |
PII sent without SHA-256 hashing | Hash email/phone before sending — verify with the SmartGen Hash Generator |
| GA4 DebugView stays empty | Debug mode not enabled | Use the GA Debugger extension, GTM Preview mode, or add debug_mode: true for server-side hits |
| GA4 event fires in DebugView, missing from reports | Normal reporting delay | Standard reports can take 24–48 hours; DebugView is real-time by design |
| Clarity shows no recordings after setup | Script installed twice, or blocked by a consent tool | Confirm only one install method is active; check consent/cookie tooling isn't blocking clarity.ms |
Official Documentation & Validation Links
- Meta Business Help Center — Set Up and Install the Meta Pixel
- Meta for Developers — Conversions API: Get Started
- Meta Events Manager
- Google Analytics Help Center
- Microsoft Clarity Documentation
- Microsoft Clarity — Manual Setup Guide
Frequently Asked Questions
Do I need both the Meta Pixel and Conversions API, or is one enough?
Run both. The Pixel alone misses events blocked by ad blockers, browser privacy restrictions, or iOS tracking limits. CAPI alone misses the browser-side signals (like fbc) that strengthen ad matching. Together, with correct event_id deduplication, Meta gets a more complete and more resilient picture than either provides alone.
What's the difference between the one-click Conversions API and the manual setup?
The one-click option (Path A, Section 2.2) is Meta's April 2026 feature that handles server-side forwarding automatically for eligible accounts — no code required. Manual setup (Path B) gives you full control over exactly what data is sent and how, which is necessary for custom event structures, non-standard platforms, or accounts not yet eligible for the one-click option.
Why does Meta require hashing but GA4's Measurement Protocol doesn't ask for it the same way?
Meta uses hashed identifiers specifically to match your customer data to real Facebook/Instagram accounts for ad targeting and optimization while limiting exposure of raw PII. GA4's Measurement Protocol identifies users through client_id/user_id rather than matching against a social platform's user base, so the privacy model — and the data it needs — is structured differently.
How long does it take for tracking data to show up after setup?
Sandbox/debug tools (Meta Test Events, GA4 DebugView) show data within seconds. Standard, non-debug reports typically take 24–48 hours to populate fully in GA4. Clarity recordings usually appear within a few hours of installation.
Is Microsoft Clarity really free, with no traffic limits?
Yes. Clarity has no traffic caps and no sampling — every session is recorded, not a subset — and remains free regardless of site size.
What's the single most common mistake across all of this?
Installing the same tracking method twice — a partner integration alongside manually pasted code, for Meta, GA4, or Clarity alike — which causes doubled events far more often than any API misconfiguration does. Before troubleshooting anything more complex, confirm each tool is installed exactly once.
Should I remove test_event_code before launching?
Yes, always. Leaving it in production payloads routes those events into Meta's sandbox test view instead of your live conversion reporting, which will make your real campaign data look artificially empty.
This guide is maintained by Sayad Md Bayezid Hosan. Interface details, button labels, and API versions for Meta, Google, and Microsoft products can change after publication — always cross-check against the official documentation linked above before relying on this for a production launch. Free tools referenced in this guide, including the Hash Generator, JSON Formatter & Validator, and UTM Builder, require no login. SmartGen Privacy Policy · Browse All SmartGen Tools
Comments
Questions and corrections welcome — I read all of them.
No comments yet. Yours would be the first.